
Biscuits, Flapjacks and Cake Pops
Updated: May 6
I have lumped these three together in a post , because they are all easy to make and add a versatile bake range to take along to any child or adult informal get together .
So lets start with the most useful of the three in my book .
Cookie Time
Despite the title I actually prefer to call them biscuits . I don't want to be racist towards Americans at all ( I nearly said , apart from Donald Trump , but then decided against it as this is not a political blog .)
It's just that I prefer the words I grew up with : Biscuits (not cookies) , Father Christmas (not Santa) , Films (not movies) , Chips (not fries) , Football (not soccer) - I could go on, but I am probably going a bit off track here and I hope I haven't upset any Americans . If I have, all I can say is Sorry (not "my bad")
So back to Biscuits .
It is so good to have a reliable biscuit recipe in your growing repetoire (ok , I know that's French)
Biscuits can be stored in an airtight container in the fridge for 4 days or frozen for 2 months . You can even freeze the raw biscuit dough and pull them out , defrost and cook for instant fresh biscuits whenever you want them ( a better smell than coffee if you are selling your house and have a viewing). You will also give your family or friends the impression that you are a magic fairy , creating bliss from thin air .
This is the basic biscuit recipe , but I will give you the whole range of tasty biscuit variations that you can create , just by adding a few favourite ingredients.
Basic Biscuit Recipe
150g unsalted butter at room temperature to allow for easier beating
125g caster sugar
125g light brown muscovado sugar
One large egg
One tsp vanilla extract
200g plain four
One tsp baking powder
1/2 tsp salt
An important tip with any biscuit type you decide on , is to avoid over cooking the dough . It is better to remove the biscuits from the oven while they are still soft , because they continue to firm up as they cool .
Also , if you want a thicker biscuit that doesn't spread out as much while cooking , then chill the tray of biscuit dough balls for a short while before placing in the oven .
Method
Preheat the oven to 180C (160C fan , 350F)
Grease and line two baking trays with baking paper . Allow a little overhang to help make the eventual washing up easier .
Cream the now soft butter and both sugars with an electric mixer or hand whisk , until you get a pale , smooth , fluffy mixture .
Beat in the egg and vanilla extract until fully combined . (Always scrape down the sides of the bowl with a spatula and then beat again to mix in fully ) That was a Chef Chahna tip , so we had better do it.
In a separate bowl , use a metal spoon to thoroughly mix the flour, baking powder and salt , or else sift together to get an even mixture . Add any other dry ingredients that the different biscuit flavours may require . (I will give you the ingredients for a range of different biscuit flavours later on) .
Roll lumps of the dough in your hands into walnut sized balls and place onto the two baking trays , allowing at least 5cm space around each ball . Flatten slightly with the back of a dessert spoon and place both trays in the fridge for 5 minutes to stop the biscuit mixture spreading out too much. You don't want a biscuit pancake , or maybe you do .
Cook for about 10 minutes , aiming for set edges but a soft centre .
Leave to cool on the baking tray for 5 minutes and then lift each biscuit onto a cooling rack to allow it to harden fully .
Warning : The smell of freshly baked biscuits will draw husbands , children and even random passer-by's into your kitchen . So allow for some reduction in your final volume of biscuits , but get the rest into your airtight containers as fast as you can , or else you'll be back to square one .
Biscuit Flavours
Chocolate Chip Biscuits
30g of cocoa powder can be added to the dry ingredients for an extra chocolatey dough (not essential)
Add 150g of chocolate chips . You can also chop up 50g of a chocolate bar into small chunks and mix in with the chocolate chips for an extra chocolate kick .
The chocolate chips and the chocolate chunks can be dark , milk or white chocolate , depending on your preference . So many choices . Perhaps decide on one option before you start , or you could go into full- on chocolate confusion .
Cinnamon and Raison biscuits
Add 1 tsp ground cinnamon to the dry ingredients and mix in .
Add 150g sweet raisons or currents . Mix into the biscuit dough as you add the dry ingredients .
Lemon and Blueberry biscuits
Add 4 tsp grated lemon zest and 150g fresh blueberries to the mixture after you have added the dry ingredients . Fold in well to mix .
You really can use your imagination to turn the basic biscuit recipe into your own creative masterpiece . Be confident and try any flavours you have a yearning for. Or at Easter , Christmas , Valentines , special birthdays or special occasions , customise your biscuits to fit the bill . Honestly , it will really make any recipient feel so special and loved .
Good luck with experimenting and I hope that you get at least one biscuit for yourself before they all disappear .

Flapjacks
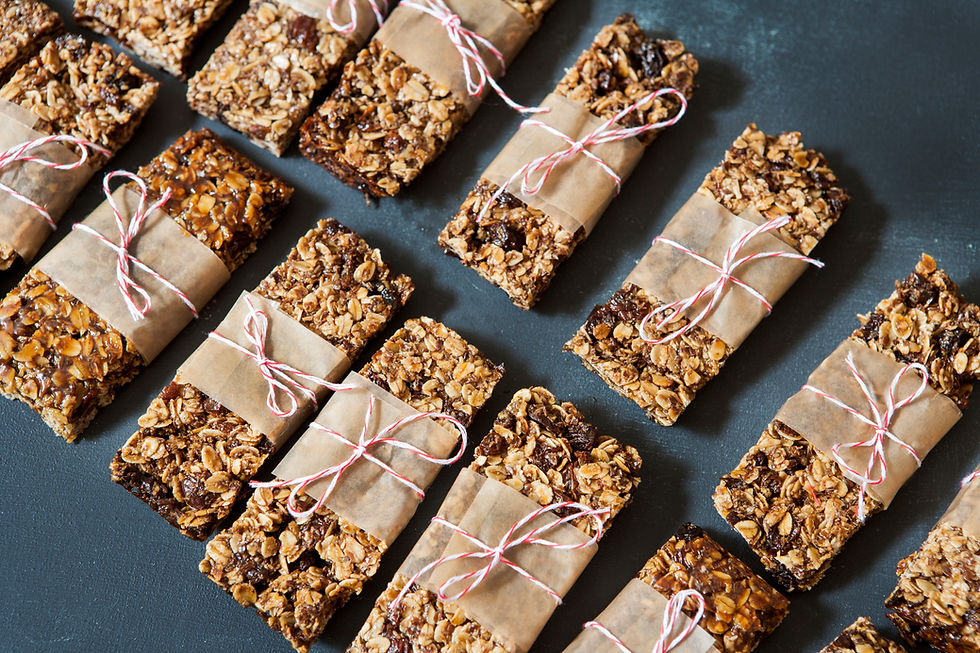
This is the easiest and most delicious flapjack recipe I know . I used it regularly in New Zealand when I had a young family , not a lot of spare time and loads of birthday parties , school trips and school functions to produce baking for .
I always think of flapjacks as a child focused treat , but actually they are just as tasty and enjoyable at any age , especially with a mug of hot tea or coffee and no one around to disturb your delicious quiet moment .
So make sure you too give yourself one of these moments every now and then , I know that you deserve it , because all of us do . We all deal with the demands of life as best we can . Enjoy your little bit of time out .
Recipe
125g unsalted butter
90g golden syrup (3 full tablespoons)
90g light muscovado brown sugar
250g rolled oats
If you want an even more indulgent and thicker flapjack
260g unsalted butter
4 tbp golden syrup
280g light muscovado brown sugar
500g rolled oats
Method
Grease a shallow baking tray and line with greased baking paper . Allow the paper to overhang the tray so that you can easily lift the flapjacks out once baked .
Preheat the oven to 180C (160C fan)
In a large saucepan , melt the butter , golden syrup and sugar together until just dissolved . Use a low heat so that the mixture doesn't boil because that will create a solid , cruchy flapjack that no older person with fragile teeth would want to tackle . And by older , I am thinking here of myself too .
Once dissolved , remove the pan from the heat and stir in the rolled oats until fully combined .
Spoon the mixture onto your prepared baking trays and press down with the back of the spoon until level .
(The edges will likely rise whilst cooking , but simply press these back down again when you take the tray out and the flapjack is still warm and pliable . )
Bake for 25 minutes for a softer , chewy flapjack , or for 30 minutes if you prefer a crunchier flapjack .
Another tip for a softer , chewy flapjack , is to leave the unbaked mixture to sit in the tray for 10 minutes before baking . This allows the oats to fully absorb the liquid and keep their soft nature .
Let the flapjack cool for 5 to 10 minutes still on the baking tray , then mark out pieces with a knife. I will leave you to decide on the size of the pieces , but suffice to say , give yourself an extra large piece , because you are the cook and need to taste and approve your product before offering it to the rest of the mob .
Once the flapjack has fully cooled you can complete the cutting out process and then sit and enjoy your ultra large flapjack piece with a dollop of whipped cream and a good film or else relaxing music , or even just some precious silence (rare in my house) .
Flapjacks can be stored in an airtight container for a few days and also freeze well . In both cases, heat in the oven or microwave for a short time before serving to create a delicious warm treat .
One last tip . To make the spooning out of golden syrup in any recipe way easier , heat the tablespoon first by pouring boiling water over it . The golden syrup will slide off the spoon miraculously without any mess or sticky fingers . This helpful tip applies to honey in a recipe too.
Sorry another last tip . If you want a healthier flapjack you can add any of the following ingredients . Do this at the same time as you add the oats .
1. Mixed seeds (pumpkin , sesame , sunflower)
2. Dried cranberries or raisons
3. Dried apricots or dates
Probably only add about 50g of any of these healthy options and definitely not all of them together -unless you are really looking to break your teeth .
So whether you are a health heathen like me or a health nut , decide on your customised flapjack and experiment with ingredients and quantitie .
Have fun and enjoy the process . xxx
Cake Pops
I feel a bit out of my league with this one . It is so popular on social media right now (according to my 18 year old twins) , but it didn't even exist in my own childhood or even in my early adult baking days.
However , luckily I have two up to date teenagers living at home , and one of them wanted to make cake pops for her sixth form fundraiser . So I just tagged along with the whole rather messy , inefficient process and offered little bits of tentative advice every now and then .
So I am giving you the recipe and method she used as well as some added tips that enhance and clarify the whole cake pop experience .
I would say that cake pops are perfect for any party (child or adult) and also for anyone who is on a strict diet and just wants a small treat rather than a whole cake pig-out .
P.s You will probably need to buy some lolly pop sticks . We used toothpicks because that's all we had (and 18 year olds don't tend to plan ahead) The toothpicks were fine , just a little more fragile than the proper lolly pop sticks . You will probably need to buy these online , I have never seen them in a shop, sorry.
So put on your young and trendy hat or sunglasses and let's do it .
Recipe
100g unsalted butter at room temperature
100g caster sugar
1/2 tsp vanilla extract
2 large eggs at room temperature
100g self raising flour
This is the basic cake recipe you learnt in an earlier post . The next part of the recipe is for a buttercream . You will need this to mix in with the cake once it has been cooked and cooled , in order to allow for easy molding into the cake pop sized balls .
Buttercream Recipe
75g unsalted butter at room temperature
150g icing sugar
1/2 tsp vanilla extract
1 tbsp full fat milk
To Dip the Cake Pops
200g of milk , white or dark chocolate - whichever takes your fancy
Coloured sprinkles (I called them 100's and 1000's in my day)
Method
First for the cake
Heat the oven to 190C (170C fan)
Grease a 20cm cake tin with removable base and line with baking paper
Beat the now soft butter , sugar and vanilla essence together in a large bowl with an electric or hand whisk until pale and creamy .
Whisk the eggs and slowly beat them in a little at a time to avoid curdling
Sift in the flour and fold into the mixture using a metal spoon
Scrape your cake mixture into the cake tin and bake for about 20 minutes until risen and golden brown
Allow the cake to cool completely on a wire rack
Now for the buttercream
Beat the softened butter and icing sugar in a large bowl with an electric or hand whisk until smooth
Add the vanilla essence and milk and continue to beat together
Take your fully cooled cake and using your hands , crumble the cake into rough crumbs and add to the butter cream . Stir together
Again , using your hands , scoop out a handful of the cake/buttercream mixture and roll into a walnut sized ball .
Place each ball of cake onto a lined and greased baking tray and put the full tray into the fridge for an hour to set .
If you are using lollypop sticks , you can push one into each ball before putting the tray in the fridge . If using toothpicks , we found that it was better to push a toothpick into each ball after it had been rolled and coated with chocolate , otherwise the toothpick had no grip and just pulled out of the cake ball .
Melting the Chocolate
Either melt your choice of chocolate in a bowl over a pan of simmering water , or else in a bowl in the microwave using short 30 second intervals , stiring each time . (See post on how to melt chocolate)
Dip your chilled cake balls into the melted chocolate to fully coat .
(If using toothpicks , coat the cake ball in chocolate using a metal spoon , then push a toothpick into each ball before the chocolate sets)
If you are going to add 100's and 1000's , then either dip the chocolate coated cake pop into a separate bowl of the coloured confectionary , or else just shake the stuff over the cake pops before the chocolate sets .
Perfectionists let their cake pops dry and harden standing upright in a mug . This method prevents a rim of chocolate hardening around the base of the cake pop as it is left to cool on a baking tray . But I think that this rim adds character , it reminds me of the rim of toffee around those fairground toffee apples from my childhood . It also means that you dont have a pile of mugs to wash up later on .
Ok , I know I just gave you a massive recipe and method after giving the impression that cake pops are easy . Believe me , they really are easy , its just a three stage process which means a lot of writing for me and washing up for you . But you have already mastered each stage separately in the cake post and melting chocolate post , so think of the cake pop as a recap and extra practice for skills you learnt earlier . Its a bit like revising for an exam (or maybe that is too horrible an analogy and best not remembered)
Anyway , at least you are trendy and "with-it" now , also you can annoy any teenagers you know by saying your cake pops are "bussin" and "lit" ( just pretend you know what you're talking about ) xxx


Comments